Ribbon microphones are finally coming back into vogue these days after a long, unexplainable hiatus from the recording studio. The sudden proliferation of Oktava's ML52 is in no small part due to the relatively low price (they can be picked up on eBay for around $300), and their sound is, well, quite good. However, Oktava has long been notorious for poor quality control, and each mic varies fundamentally in how they sound — some are darker, some are brighter, etc. Regardless, there are some nifty modifications that can be made to improve the mic, and they're very simple and cheap to do.
First off, the pictures in this article of the "MK-II" model — MK Is are a single ribbon design, and the MK- IIs are a dual ribbon design. In the interest of space, I won't go into the benefits of one over the other, but I use both, and the same modifications make both better, so let's get started. You will need:
A soldering iron
Solder (is this obvious or what?)
A narrow-tipped flathead screwdriver
Hookup wire
A Lundahl 2911 ribbon mic transformer (available from www.kandkaudio.com for $58 plus shipping)
Wire clippers
Rubber cement (best) or crazy glue (in a pinch)
A thin gossamer fabric, about 1' square. And c'mon, no panty hose. Use some cheap see- through panties. It's gonna add vibe. (for MK-Is only)
Optional — Panavise (I only have two hands, so this makes things easier)
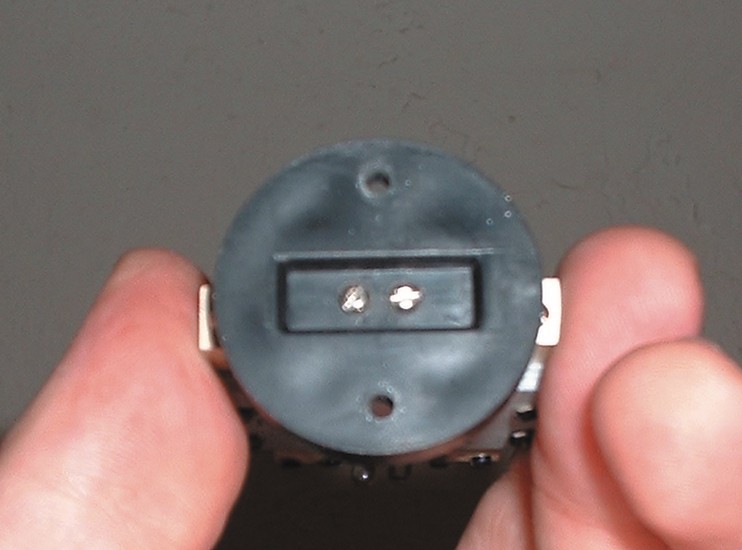
First things first — remove the four screws on the bottom ring of the mic.
Gently remove the bottom ring (gently may not be an option — sometimes these things are pretty jammed on there. No disclaimers on how you get it off...) Now it looks like this: (picture 1)
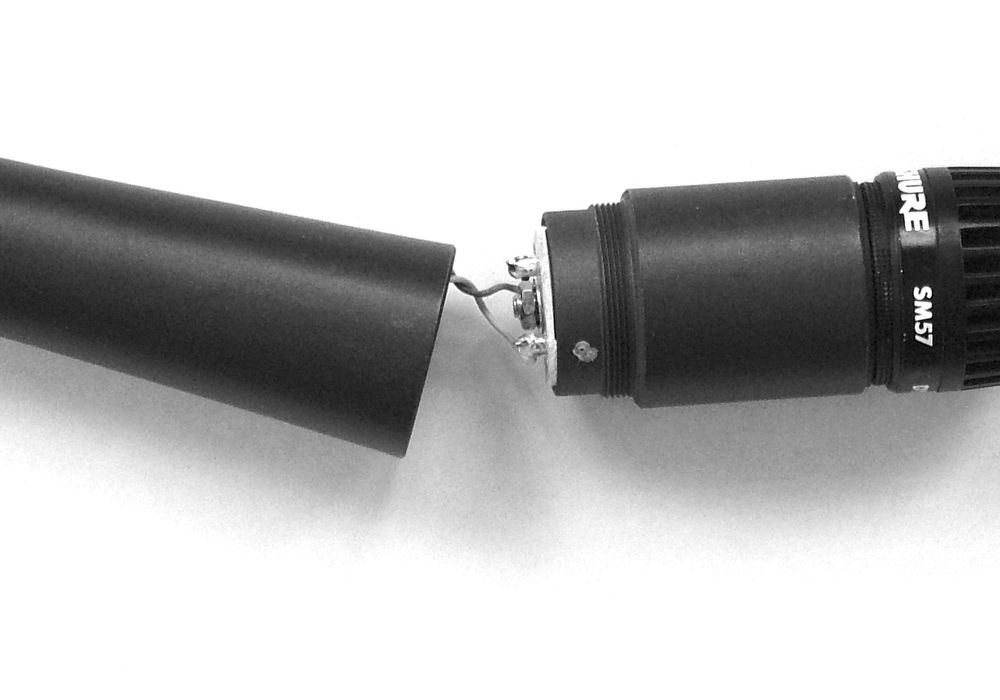
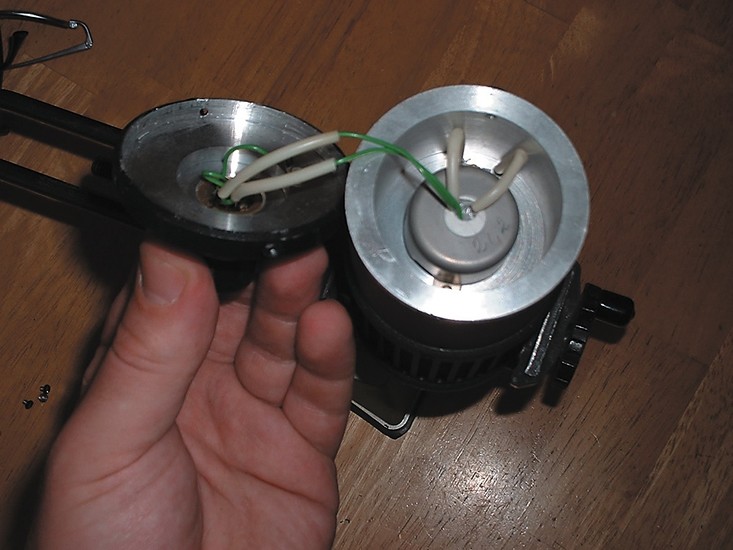
Clip the two green leads leading to the XLR plug — but save those wire insulators -they come in handy later. (picture 2). Get your soldering iron hot and tin the tip (melt a little solder on there). ALWAYS USE SOLDER WHEN DESOLDERING. Desolder the two disconnected green wires, but leave the short one connected to the body pin alone. We'll use it later.
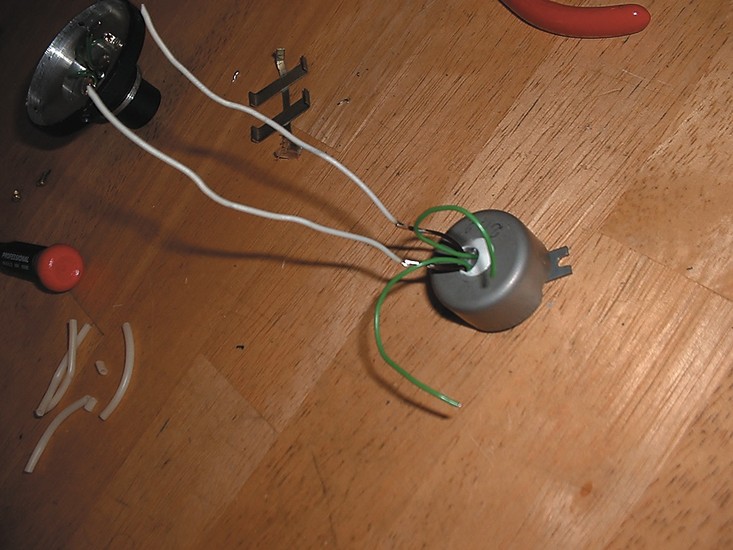
That alien boat in the middle of the cavity is the transformer you're replacing. Take out the screws, clip the leads going up into the head and take it out. Feel free to throw it away or (encouraged) open it up and look at it to get an idea of what a transformer looks like. (picture 3)
Now remove the four screws that hold on the grill. Be careful breathing — you're now operating close to the ribbons, and blowing too hard/sneezing will rip them. Don't sweat it — I've only done this once after working on many ribbon mics, and I wasn't even the one who sneezed.
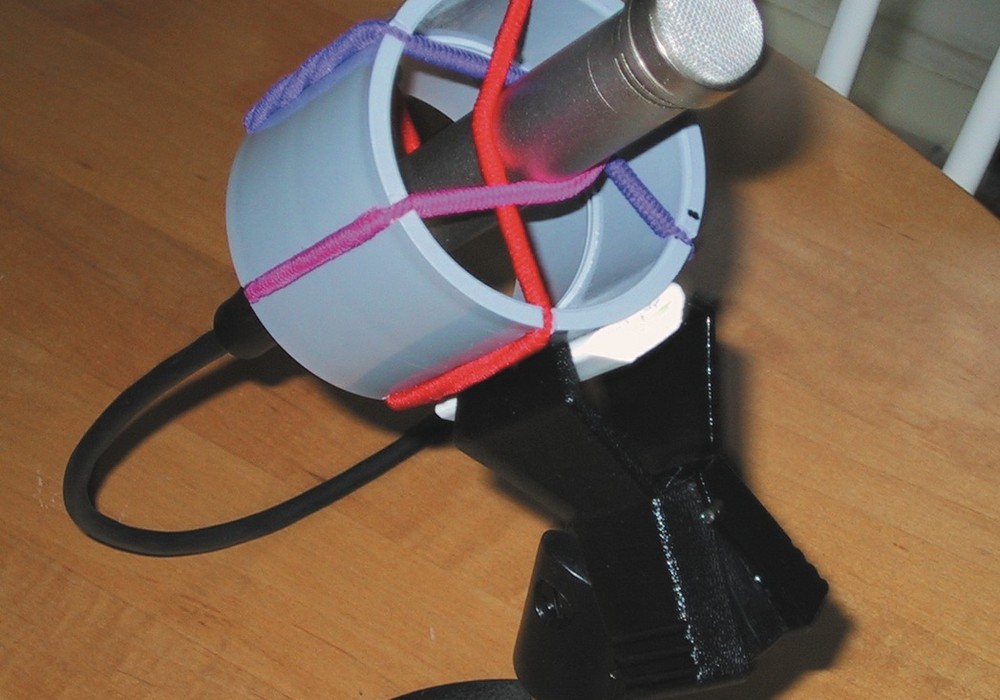
Let's take a look: (picture 4) See that brass cross on both sides? Just pry it off from the sides (it's held on with cheap glue). It's supposed to a) protect the ribbon and b) provide some sort of resonant frequency. Whatever. Oktava has some weird ideas.
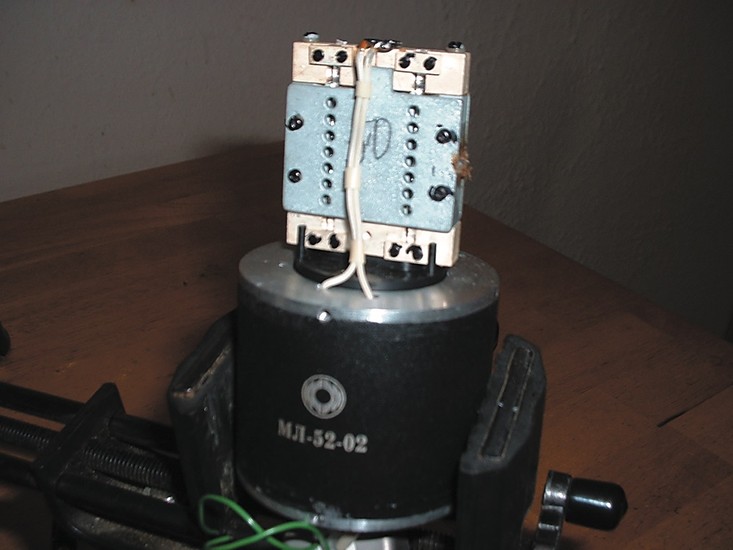
Is the head assembly jiggling a little bit? Remove the two black screws that hold it to the body, flip it over, and tighten the two gold screws underneath. (picture 5) Then re-attach it. No-brainer.
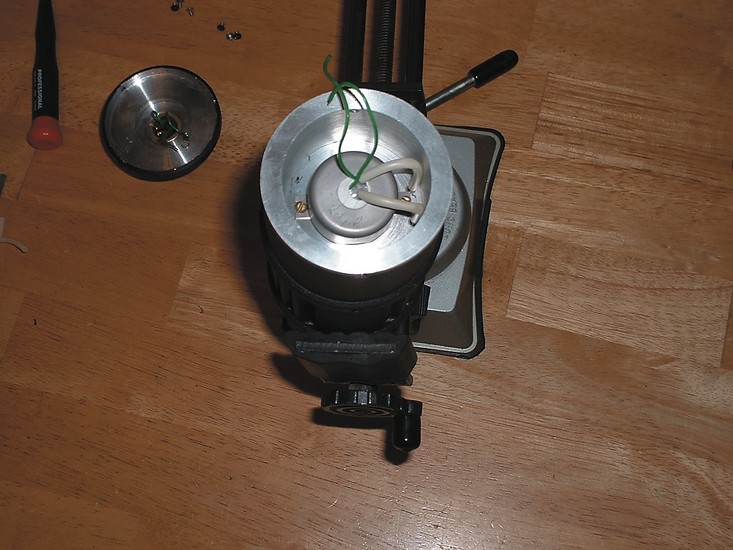
Now, desolder the white leads by heating the connection points at the top of the head assembly. That's some cheap-ass wire and we can do better with Radio Shack.
Cut two 7" lengths of new wire, strip about one- quarter inch off one end of each, and tin that. MORE SOLDERING TIPS — FRESH SOLDER SHOULD BE ON BOTH ENDS OF A CONNECTION BEFORE CONNECTING THEM. Now, remember that insulation we took off earlier?

Cut off a little bit and slide it over the wire. Connect both the leads and slide the insulation over it. Clean work is good work. Twist the wires together and feed them through the holes that lead down to the cavity. Things should now look like this: (picture 6)
If you're working on a MK-II, skip this step. Take that thin gossamer you bought, cut out a rectangle of fabric that will cover the inside ring of the grill and glue it on around the edges. The top dome of the grill comes off to make this easier. MK-IIs already have a fabric lining.
Put the grill back on. Top is done.
Transformer time — one side has six pins, the other has five. Orient it so the six pins are on the right. TIN EVERY PIN except the four corner ones that are close together. You'll need to strap the corner pins together on all four corners — A quick and dirty way to do this is to strip off the insulation on a piece of hookup wire, take about three strands and wrap a figure eight around the pins about four times. Once it's wrapped, then tin the whole thing. Don't try to make it a blob of solder, but if it happens, that's okay.
You need to make an "X" across the corners. Cut two lengths of hookup wire and strip a bit off both ends. Connect one end to the corner "blobs" on the right side (the side with six pins).
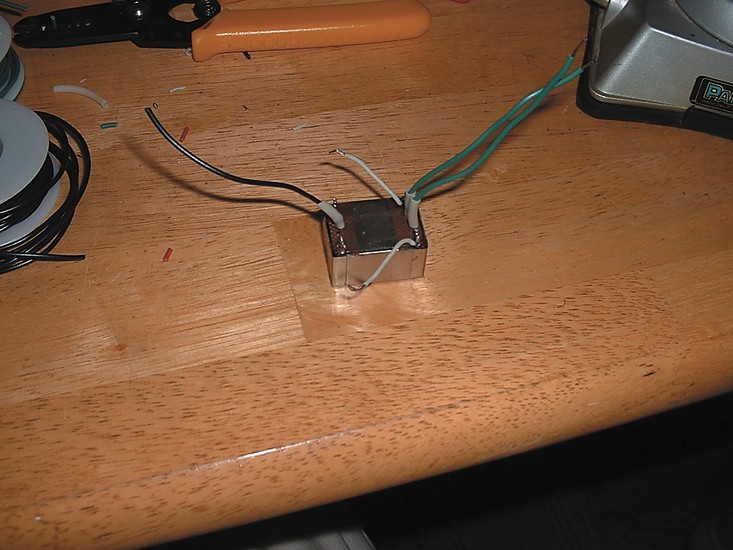
Cut three lengths of hookup wire about three inches long, strip a little off all ends, tin them, and attach one to each of the stand-alone pins you haven't messed with yet. Use some more of that insulation you saved earlier. The whole thing should now look like this: (picture 7)
Okay, the rest is tricky only because it's hard to hold everything at once. Maybe get a friend to help. Basically, the wires leading down from the head assembly need to attach to the corners you haven't connected your "X" to yet (red wires to the white wires to the strapped corner posts in the picture). Hopefully, your wire lengths are long enough where you can just wrap them together. Just do it.
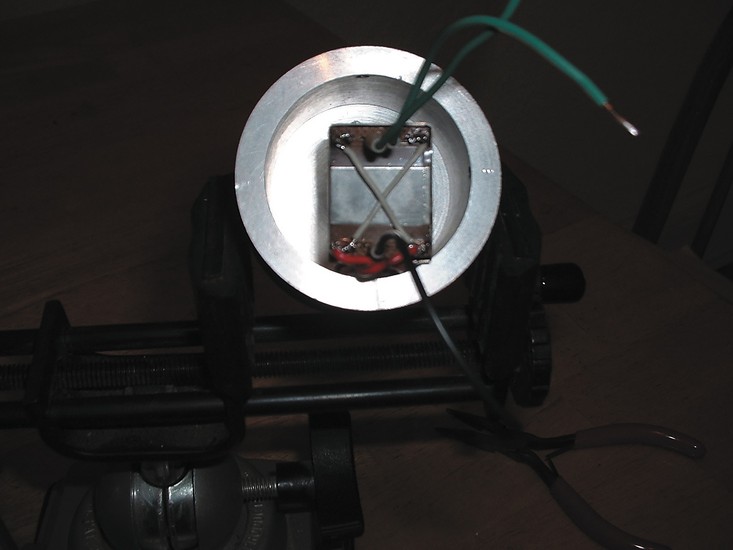
At this point, glue the transformer into the cavity. It makes things easier. Looks better, too. Looks like this: (picture 8)

In the picture, I used the green wires to represent + and — audio — these go to the XLR connector on the bottom pan. The black wire is ground here (purists who only use green for ground can just bugger off). I connect that to the little pin attached to the pan and leave the tiny green wire connected to the XLR ground pin alone. It's easier, that's why. (picture 9)
Screw the bottom pan back on. You're done! Try it out! If you're not getting signal, check all of your connections — you might have a cold solder joint. Also, you may want to flip the phase (reverse + and -), check it out by listening, and flip the XLR connection if warranted.
This is pretty easy stuff to do, and you can clearly hear the difference. I recorded some before and after clips and heard the highs open up, the middle range transitions smooth out, and the bass become less "boomy". Overall, much better. Hopefully, you'll have fun doing it, and in the end have a better microphone to add to your toolbox.