Like many other Tape Op readers, I have a home studio. Although I've had numerous opportunities to record in "real" recording studios, I often prefer the laid-back comfort of my own living room. My home setup has neither the carefully constructed walls nor the special acoustic treatments of a well- designed studio — but the no-cost, no-rush feeling of working in my own space and the comfortable amenities of my home (a fridge stocked with more than just cheap cans of beer, windows that let in sunlight, a back porch to sit on) have been compelling arguments to stay at home.
Over the years, my goal has been to make recordings in my home that approach the quality of recordings made in pro studios — and I've since discovered some techniques that can make my modest living room sound more like a big studio. For me, the sound of a "real" studio versus a home setup has more to do with the live sound than it does the cost of equipment: It's the interaction of the instruments with the room and how that interaction is captured on tape. With no other instrument is this more evident than with a drum kit.
A typical home recording of a drum kit sounds exactly like it was recorded at home — in a small room. On the other hand, a drum kit recorded in a pro studio will tend to sound bigger — with the ambience of a large tracking room giving life to the drums. This recipe is one way that I achieve that bigger drum sound in the confines of my humble home. Let's go through this recipe in steps.
Control the acoustics in your room.
Most rooms in a house are boxes with parallel walls, floors and ceilings. Parallel surfaces tend to accentuate some frequencies while attenuating others, and corners in which surfaces meet collect and release low end. To capture as smooth of a sound as possible, you want to reduce the detrimental effects of your room's square geometry. You can spend a lot of money on special treatments, or you can use what you've got lying around the house. Let's go the cheaper route and save the money for buying more mics.
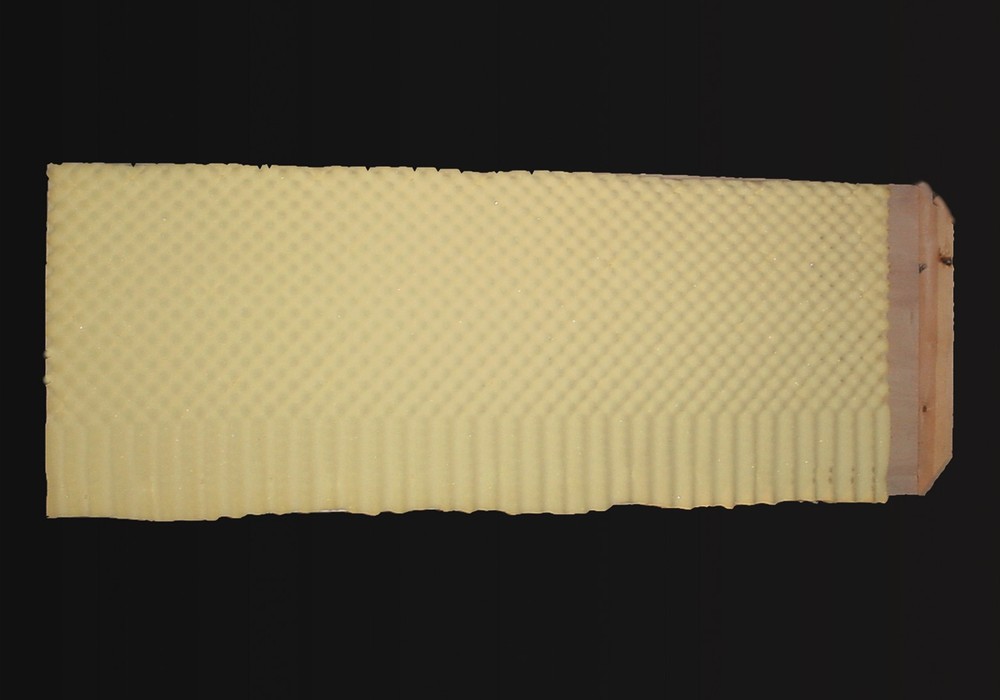
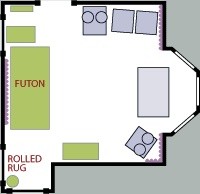
Here's what I did in my living room. Equipment racks, large tape machines, and tall shelves are pushed into the corners. I found some surplus acoustic foam and placed it on one wall. I attached remnants of a shag rug on the opposite wall and covered the ugly rug with a curtain. A heavy cotton futon pushed against the wall with the largest unbroken span makes a great bass-trap, soaking up unwanted bass resonance.
Be careful not to over-treat your room. If you use too much foam or too many rugs, you'll end up with a room that sounds "dead". Higher frequencies will be absorbed while lower frequencies will run rampant, leaving you with the typical bedroom sound.
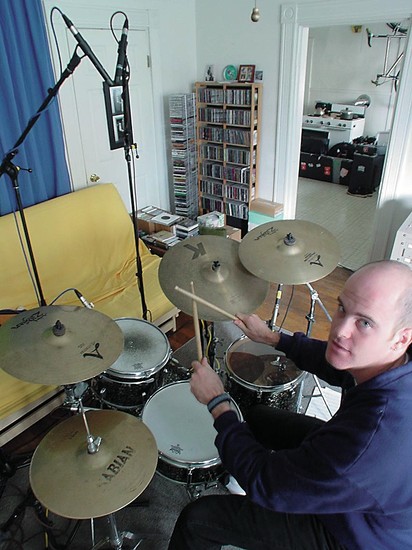
Experiment with the position of the drum kit.
I would recommend that you start with the kick drum facing a piece of furniture that operates as a bass-trap. Doing this will reduce the nasty lower- mid resonances that small rooms typically exhibit. These resonances contribute to the muddy sound of small rooms — anything you can do to reduce these resonances will make your room sound less like a box. I like to face the kit into my aforementioned futon "bass-trap". Play around with different floor surfaces. Don't just settle for what you have.
I used to use a shag rug (the remnants of which are now on the wall) as a drum rug. It was ugly, but it protected my wood floor from scratches and kept the drums from sliding everywhere. One day, I found a perfectly sized and not-as-ugly rug for sale at a local supermarket for $12. Unlike the shag rug, this one was tightly woven and quite stiff. It made a huge difference in the sound of the snare drum. The mics picked up much more of the snare's crack. If you're pining for an even "brighter" floor surface, try a localized treatment. A clipboard placed underneath the snare drum can really liven up the snare.
Start with a good pair of overhead mics.
Think of your overheads as more than just cymbal mics. While close mics tend to focus on the attack of each drum hit, carefully positioned overheads will pick up more of the "body" of each drum, affording you a fuller sound than what you could achieve with just close mics. My preference is to use two overhead mics to pick up a stereo image of the whole kit.
As a general rule of thumb, two mics recording the same sound source should be the exact same distance to that sound source when you're trying to achieve a phase-coherent, mono-compatible, stereo spread. Otherwise, you'll end up with phase cancellation of some frequencies. Recalling that the box shape of the typical home studio tends to accentuate some frequencies while attenuating others, any additional phase cancellation will further detriment the sound.
I prefer to set up my overhead mics in a modified X-Y pattern, with the diaphragms of the two mics as close together as possible. This way, everything they pick up will be phase-coherent: All sounds will hit both mics at the same time. Therefore, the pair of mics will not contribute additional peaks and dips to the frequency response of the room.
You can vary the relative amounts of drums versus cymbals by moving the pair of mics up and down or forward and backward, or by pointing the mics closer into the drums or further outward toward the cymbals. I usually start with the overheads about six feet off the ground, directly above the drums. Because the signal from the overheads will be the foundation of the drum sound, choose your best mics and mic preamps for this task.
Add close mics as necessary.
Once you're happy with the sound of your overheads, you may want to add close mics to spice up some or all of the individual drums. I'm a big fan of using omni mics on the kick and snare, especially the Earthworks micro- diaphragm condensers. Because omni mics don't exhibit proximity-effect, you can place them right up to a sound source without picking up an unnatural boost of the low- mid frequencies. Be cognisant of phase-cancellation as you bring in more mics. You may need to flip the phase on some of the individual close mics or move the overheads closer to, or away from, the drums.
Close-mic'ing picks and techniques:
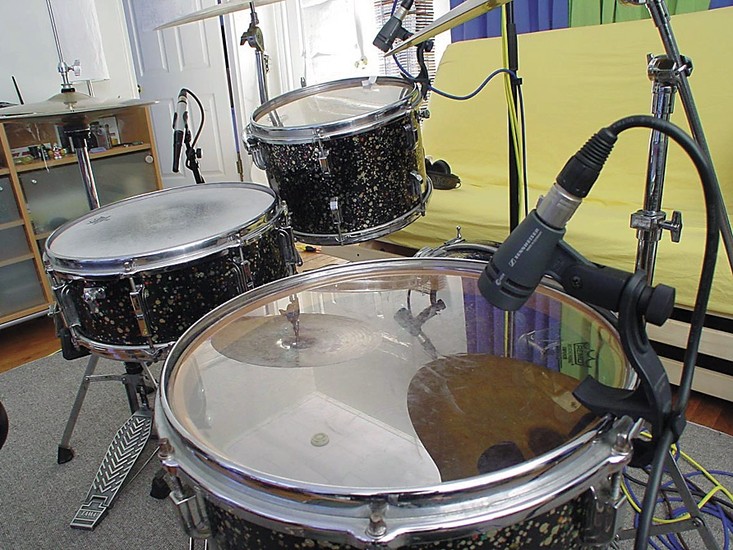
Snare: An Earthworks TC30K is positioned within 1/2'' of the shell. You may be surprised at how realistic a snare sounds when mic'ed via its shell. By changing the height of the mic along the shell, you can vary the amount of top head versus bottom head in the signal. The hole on the side of the shell is a good place to pick up the "blast" of the snare. Make sure that the blast doesn't blow air directly onto the diaphragm of the mic. An Earthworks SR69 cardioid mic is positioned to pick up "slap" from the top head. This slap is especially useful in driving a reverb unit if artificial ambience is required in the mix.
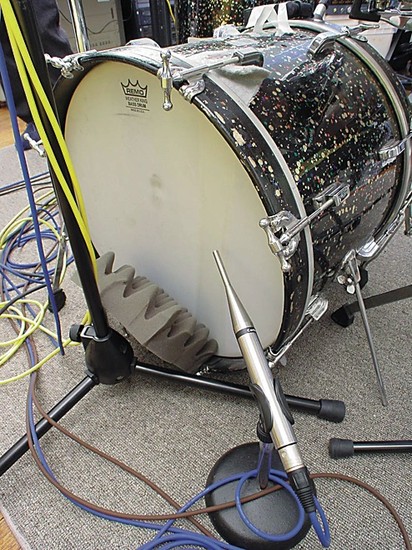
Kick: A second TC30K is used for the front head. A piece of foam is wedged between the kick drum's floor pins and the edge of the head to provide a teeny bit of damping.
Toms: A Sennheiser E604 placed over the floor tom. Pointing the mic at the center of the drum results in more "boom," while bringing the mic closer to the edge of the head usually results in more "stick."
Room: A Royer SF-12 stereo ribbon mic in one corner of the kitchen is used to pick up ambience. Without a direct line-of-sight to the drum kit, this mic picks up less cymbal splash and more drum reverb. Don't worry if you don't have an expensive mic to dedicate to this application. I've used SM 58s and Radio Shack PZMs with great success.
Don't rely on EQ to define the sound of your room.
EQ'ing multiple mics or even EQ'ing one mic out of a multi-mic setup won't sound as good as getting all your mics to pick up the right sound in the first place. Furthermore, an EQ can't smooth out the sharp peaks and dips of a poor sounding room. Therefore, unless you're using the EQ as an effect, use it sparingly. Focus first on making your room sound good. Then play with mic position to obtain the sound you desire. Use room mics to add ambience — you can place these room mics in another room if possible.
"Room Mics"
A typical mic setup in a large studio involves setting up room mics far from the drum kit to pick up the studio's natural reverb. Oftentimes, these room mics are faced into walls to pick up less direct sound and more reflected sound. Unfortunately, using this technique at home usually results in a smaller sound, not a bigger sound. You end up accentuating all the anomalies — and therefore the acoustic character — of a small room.
Fortunately, homes tend to have multiple rooms. So it's easy enough to open a door and place your room mics in an adjoining room. I prefer mic'ing my kitchen, with its hard surfaces providing natural reverb and the large appliances providing ample diffusion. I place the room mics near one corner of the kitchen, making sure there isn't direct line of sight through the open doorway between the mics in the kitchen and the drum kit in the living room. If I need an even bigger sounding space, I'll delay the room mics during mixing by 10-15 ms.
Experiment.
Think of this article as one person's starting point. Then explore your own tangents and break your own boundaries. Try something new. Celebrate serendipity, and revel in the fact that you're not paying big-studio rates to record in your living room.