
(Disclaimer: This article is missing images and parts list. The writers originally offered up a kit of parts and stopped doing so many years ago. This is an incomplete article and please do not email the magazine for more information.)
Plate Reverb. Many people ask me about this and I usually tell them to listen to some records from the '70s and '80s and look for reverb with a thick, pillowy sound that doesn't obscure the vocal yet doesn't quite sound like an actual room. The sound itself, as you'll see, is created through mechanically vibrating a plate of steel, picking up the decaying vibrations and re-amplifying them — much the same way a spring reverb works. They're hard to find used these days, and we were lucky enough to hook up with Bob Buontempo and obtain a reworking of his article from 1983, originally written for Modern Recording and Music. Thanks Bob and Joe!
In 1983 I was the owner of a 2" 16-track studio. One of the things that really separated the sounds we could get from the sounds of recordings made in major facilities was the quality of the reverb. Spring reverb was the only affordable system for small studios at that time, since EMT plate reverbs ran almost $9,000! EMT's patent was about to expire, and when it did, competitors came out with similar products. While they were cheaper, they still averaged $2,500! So, an engineer who worked with me, Joe Errico, and I researched plate reverbs, and I came up with an affordable way to build one.
This article presents plans for making a plate reverb unit, which won't require any electronics other than your mixer and a headphone amp. The construction cost will be between $100 — $500, depending upon what components you already own. This article will describe how to find and evaluate the materials needed, construct the frame, mount and tune the plate, fit the driver and pickups, and add dampening to the plate. It concludes with some "tricks" and techniques for enhancing plate sound.
For the complete do-it-yourselfer, diagrams, photos, and a parts list are included. A kit providing mounting/isolation hardware, driver, pickups, pre- amps and tuning CD is also available (see parts list). The individual parts are also offered separately. The kit may help facilitate the project by eliminating the hard task of locating and evaluating the required parts.
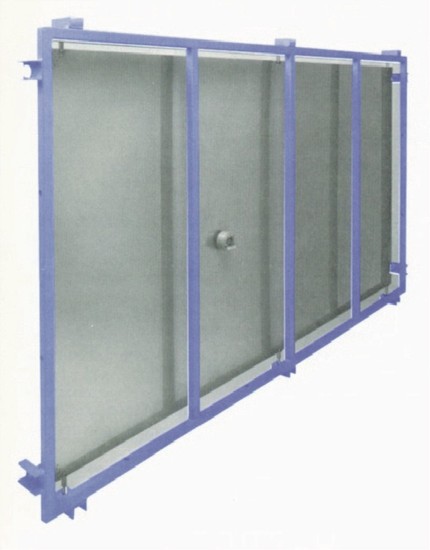
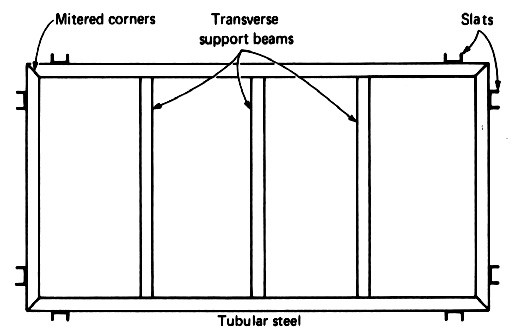
Typically, the plate is a large (one by two meters, or 39.37 by 78.74 inches) sheet of steel suspended in a tubular steel frame. In theory, the plate simulates a large concert hall, or church, with a decay time (RT-60- the time required for the level of the reverb to diminish by 60 dB) of approximately five seconds at around 500 Hz. A driver attached to the plate excites it, and as the sound waves travel through it, the plate flexes. The plate's motion is then picked up by one or two contact mics and added to the dry signal at the mixer. Transients do not twang or boing like in a spring reverb, but behave much as they would in a reverberant room, sounding smooth and natural. Incorporating a damping plate to change the decay time of the reverberated signal can be included in the design, as an additional feature.
It was at the Broadcast Technical Institute in Nuremberg, and later at the Institute for Broadcast Engineering in Hamburg, West Germany, that the first reverberation plate using these principles was developed. EMT (in Germany) patented and made the only available units until the patents ran out 20 years ago.
Construction of the Unit
As mentioned in the introduction, the design of this unit will incorporate your mixer and cue (headphone) system as all the electronics that are required. We will mostly concentrate on the construction of the mechanical system and the transducers — the frame, plate, driver, and pickups.
This is probably the most critical of all the steps involved in the process, so be careful. The plate is actually "the instrument" used for the reverb, so it should be chosen as if it were a fine acoustic instrument. EMT used a one meter by two meter cold rolled steel plate approximately 1/64 inch thick. Lawson, who manufactured "The Plate" (LP1 and LP2), used basically the same size plate, but it's a little thinner. On the other hand, some manufacturers used stainless steel. The Ecoplate by Studio Technologies used approximately the same gauge in stainless, as did Audi-ence, while DB Cassette of Sweden, who manufactured the Stocktronics plate, used a stretched, hardened piece of cold-rolled stainless approximately 0.03 inches thick. The question of what kind of steel to use is totally subjective. Reasons claimed for using stainless steel include consistency, high density, and the fact that it's tarnish proof, while regular steel users claim smooth, more natural sounding reverb and a less "metallic" decay. Only you can decide what sound you prefer.
The rest of this article is only available with a Basic or Premium subscription, or by purchasing back issue #28. For an upcoming year's free subscription, and our current issue on PDF...
Or Learn More
Sponsored
Let's DIY

Let's DIY
DIY Diffusors
by Brad Williams
While hardly a glamorous concept, room acoustics represent a critical link in the recording or playback chain. While comprehensive room design is a complex cocktail of science, math and chance...
Let's DIY
Build Your Own Spring Reverb
by Scott Hampton
I have been a big fan of spring and plate reverbs for decades, and over the past three years I have spent a significant amount of time diving into the wormhole of designing and building them,...
Let's DIY
Build a tube Mic Pre: Build Your Own Two Channel Vacuum Tube Mic Preamp!
by Scott Hampton
When asked to come up with a "do it yourself" tube mic pre project, I thought long and hard about what topology to go with. I designed a number of different hybrid tube/discrete class A designs...
Let's DIY
DIY Reverb
by Nicolas Collins
In the disembodied world of today's computer-based multitrack mixing, one can spend a lot of time crafting a unifying sense of "space." Despite the dozens of reverb plug-ins and rack devices...
Sponsored
More Tutorials
Tutorials | No. 37
Audio Chaos: Audio Chaos in the Digital Realm
by Joe Hayes
Production techniques involving sound manipulation have evolved exponentially over the past few years as creativity, experimentation and the DAW, have paved the way for new forms of sonic abuse. Sound...
Tutorials | No. 15
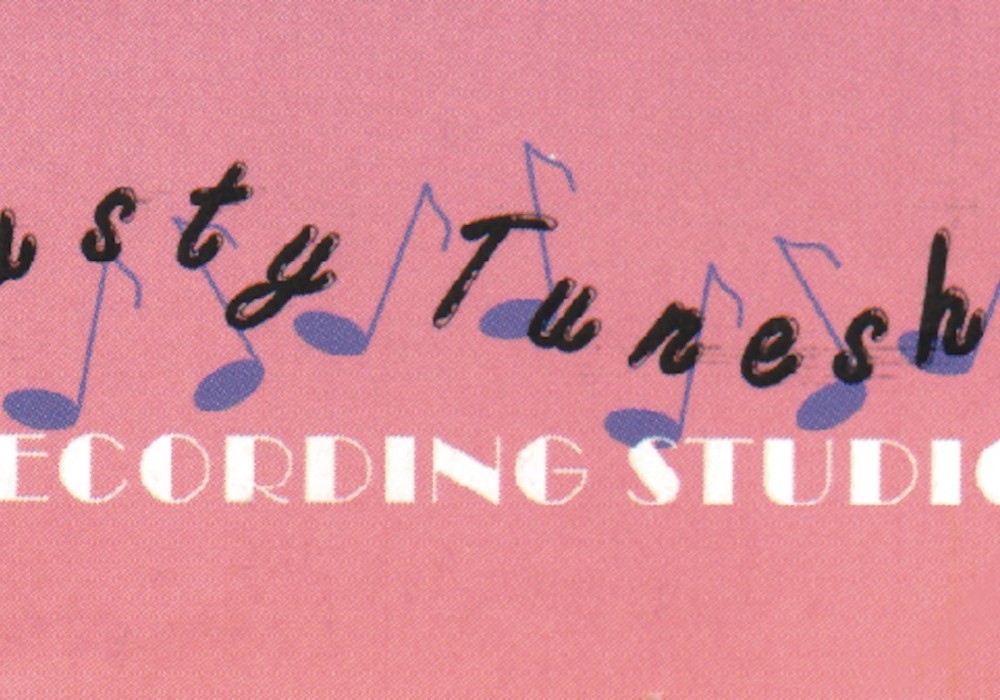
Trusty Tune Shop: A Grandma run studio!
by Larry Crane
We hear about a lot of great studios here at Tape Op but not very many are run by 75 year old grandmothers. Elsie Childers runs her Trusty Tuneshop studio on her farm in Nebo, Kentucky. The big...
Tutorials | No. 41
Three Practical and Personal Primers #1: Three Practical and Personal Primers: Microphones
by Graham Hick
Engineers are good at spreading information about recording techniques. In fact, most love to talk about recording as much as they love to make recordings. This magazine you're reading right now is an...
Tutorials | No. 4
Reading Material: Where Can You Buy Gear and Tape?
by Larry Crane

Tutorials | No. 14
Recording Recipes #6: Capturing Improvised Music
by Curtis Settino
In 1995, I had my first opportunity to try a musical experiment I'd been concocting in my head for a good 10 years. In short, the idea was merely to record some improvised music. In long, it's been...
Recording Drums | No. 41
Three Practical and Personal Primers:: Part three: The 30 Second Drum Sound
by Graham Hick
Recording music is often a challenge of doing the most amount of work within the shortest amount of time. The demand is that the work be done well and immediately, if not sooner. This is usually due...
Tutorials | No. 22
Make Your Own Pop Filter
by Craig Gurwich, Jeff Saltzman
Tutorials | No. 22
Computer Advice
by Mike Caffrey, Rob Carpenter II, Martin Chittum, Scott Craggs, D. Matz, George Rigney, Walt Szalva
I'm trying to buy a laptop and whatever other hardware I need to record music at home, and I would really appreciate some help. First off, I play piano as well as electronic instruments (synths,...
Tutorials
by
None