For ADD readers: Yes, you can build your own 1176 clone. No, Universal Audio won’t sue you. Yes, it sounds good. No, it doesn’t sound like the current UA 1176LN. No, it isn’t easy. Yes, it’s incredibly rewarding. Yes, I would do it again, but you’re not me, and I’m not you. So please read the review.
For years, people have been building classic compressors like the Bill Putnam–designed 1176 compressor. To be fair, some of these experimenters were doing this before Universal Audio was reborn and there was no other way to get an 1176, save the vintage market. Of note, Mako Natsume has been a leader in getting 1176 designs to PC boards. You can find him on the Prodigy-Pro DIY boards under the name mnats. Enthusiasts have been building his clones for years, but one thing that was never addressed was the cosmetics of the UA gear. Specifically, I’m talking about the 4-button switch assembly, rotary knobs, meter, and faceplate. These items were left to the discretion of individual builders.
But Seattle-based Hairball Audio stepped in and took the bullet for all of us. They sourced the cosmetics, meters, faceplates, and even got Ed Anderson to design input and output transformers for the kits. You still have to buy your own small, standard parts; but Hairball’s kits are an invaluable boon to builders (especially because the switches are not off-the-shelf). Hairball offers kits for black face and blue stripe 1176 models. We chose the blue stripe because it’s very different than our UA 1176LN, and we wanted an added flavor for tracking and mixing.
One of the mysteries surrounding a DIY 1176 is sorting out the numerous revisions the circuit has seen over the decades. Well, the very simplified story is that an 1176 has three key subsections: an input stage, a compression stage, and an output stage. The compression stage has remained relatively unchanged since day one, even in the models currently manufactured by Universal Audio. (One of the reasons why you don’t see any complaining from UA is that they have done a vast amount of work on their input and output stages to optimize headroom, lower noise, and achieve the sound they were striving for. And to my knowledge, the only way to get that specific revision is buy a unit from UA.) Revisions were noted when changes were made to the input and/or output areas. These were both design and component changes, so each time something was tweaked, it might have triggered a new revision letter. Now you know more about the history of an 1176 than most engineers out there. But let’s move to the assembly.
I can’t proceed without a public service announcement. I found this quote from David “Deet” Thomas about his DIY experiences: “A few months ago, I was too cheap to purchase a good studio compressor, so I decided to try to build one instead. By now I have spent enough time to record an album and enough money to buy a few good compressors, but what a ride it has been!” And that was just for one unit. And he knew his way around a soldering iron. On one hand, an 1176 project is not for people who want everything to be perfect and step-by-step. If you want that, please buy a Seventh Circle Audio preamp kit ( Tape Op #35, #54. this issue). On the other hand, researching and learning about the differences in the 1176 line, and finding out when you can substitute a part and why and where and such — that is the real value of the DIY experience. You end up learning more about audio electronics than you would have ever guessed, and you end up with a working compressor (hopefully).
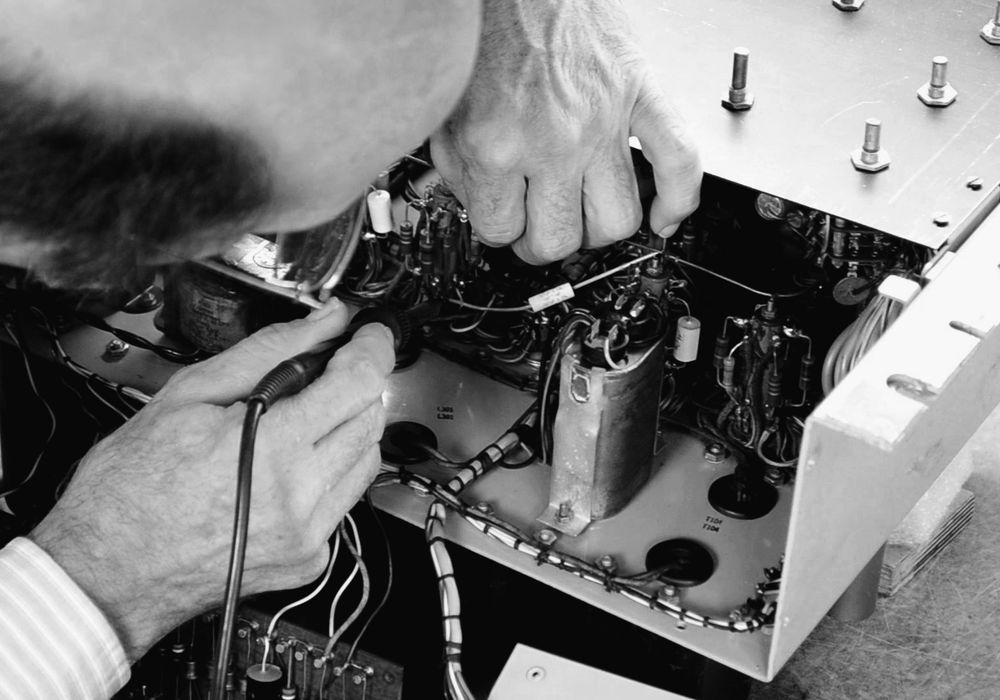
There are two beasts to battle for this build. First, you need to stuff the main PC board, the input transformer, and finish the switch assemblies (they’re not simple buttons). On most gear, that would be it. However, on the 1176, you have to face the second beast — the wiring hookup. The individual wiring tasks are not overly complex, but it is a large job that requires patience, attention to detail, and triple-checking your work. Since this is DIY, you have to rely on the Prodigy-Pro DIY forum (www.groupdiy.com) for assistance. But of great help, Mako posted a superb step-by-step photo instruction on his website (mnats.net). Once your unit is assembled, there is a short but necessary calibration process for the compression onset as well as the meter readings. Mako’s website also has videos to aid in this endeavor.
Finally, let’s start using our 1176 blue stripe clone. We compared it to our UA 1176LN for the sake of having a known baseline. Running a vocal through the units with no compression (but hitting both input and output transformers), we found that the Hairball was more transparent and true to the source. I know engineers who run things through their 1176s with the compression bypassed. (All you have to do is turn the attack knob to OFF. Many 1176 owners don’t know about that function, so it’s worth mentioning.) Overall, the Hairball has a hotter output, and we liked its shaping of midrange frequencies. Specifically, it imparts a spectacular punch to snare tracks — go for a longer release and adjust the attack to taste. But on guitars, the Hairball was a little more low-mid heavy compared to the UA. We also found that the UA was more controlled on bass guitar, presumably because of whatever low-mid bump the Hairball transformers exhibit. Vocals were another source that worked well with the Hairball. The unit kept a clarity that we look for when we want the voice to sit just above the rest of the instrumentation in a track. As an effect unit, going for pumping, we found the UA 1176LN controlled maxed-out sources with less pumping than the Hairball. But if you want a drum destruction bus, a pair of Hairballs could be the answer. Overall, the blue stripe is a more transparent box, less agile on low-mids ( e.g., distorted guitar and bass), but very capable of shaping midrange sources like voice and snare. Personally, I’m very pleased with these results. After all, if I wanted it to sound just like a UA, I would just go buy a UA. But I wanted something a little different, and the Hairball really delivers. If you have the patience, attention to detail, and time, I enthusiastically recommend one of the Hairball blue stripe kits. You’ll learn a lot and have a compressor that neither your friends nor competitors can buy out of a catalog. (FET Compressor Rev A/D Bundle with Enclosure $360 direct, www.hairballaudio.com; 1176 Rev A or D boards set $26, www.mnats.com; remaining parts approx $35, www.mouser.com or www.digikey.com)
Dynamics | No. 132
DBC-20 Diode Bridge Compressor
by Liam Judson
When I first heard that Tim Farrant of New Zealand’s Buzz Audio had designed a new stereo compressor based around a diode bridge gain reduction circuit, I immediately knew that this was...
_disp_horizontal_bw.jpg)