While hardly a glamorous concept, room acoustics represent a critical link in the recording or playback chain. While comprehensive room design is a complex cocktail of science, math and chance — certain obvious issues can be easily dealt with to improve your recordings — even in a home or project studio environment. One such problem is specular reflections, mirror-like reflections of sound that cause flutter echoes. Flutter echoes are hollow, metallic "bathroom" effects that honk at particular frequencies or discrete repeats. While absorption will control these issues by removing acoustic energy, you might be interested in diffusion instead — particularly if your space is already on the "dead" side. Diffusors come in many types, all designed with the objective of scattering reflected sound (relatively) equally in all directions.
One popular style is the 2D Quadratic Residue diffusor (often called the BBC diffusor, after a paper published by the British Broadcasting Corporation**). This design is based upon a complex set of calculations involving prime numbers whose results are then quantized into four "steps" for ease of manufacture. Mathematical proofs and theoretical explanations can be found in the BBC paper, but understanding them is not necessary to build the panels. The practical results are outstanding. Unlike many diffusors, the BBC design works equally well in both the lateral and vertical dimensions and boasts effectiveness even with modest 20% coverage. In field tests, the design demonstrated effectiveness in near field as well as far-field applications and, to a large extent, even at oblique angles.
These panels are neither difficult nor expensive to build. All that's required is to cut several wood pieces to four specified lengths and arrange them on a piece of 18 inch by 18 inch plywood or hardboard, according to the chart in Fig. 1.

The only materials required are:
- several 2 inch by 2 inch studs*** (the exact number depends on your chosen diffusor depth)
- a piece of thin 1/4 inch plywood (Masonite or hardboard is fine)
- high quality wood glue
- some means of hanging (I used aluminum wire and picture hangers for modularity, but toggle bolts would work well for more permanent installation).
Step 1: Determine Depth
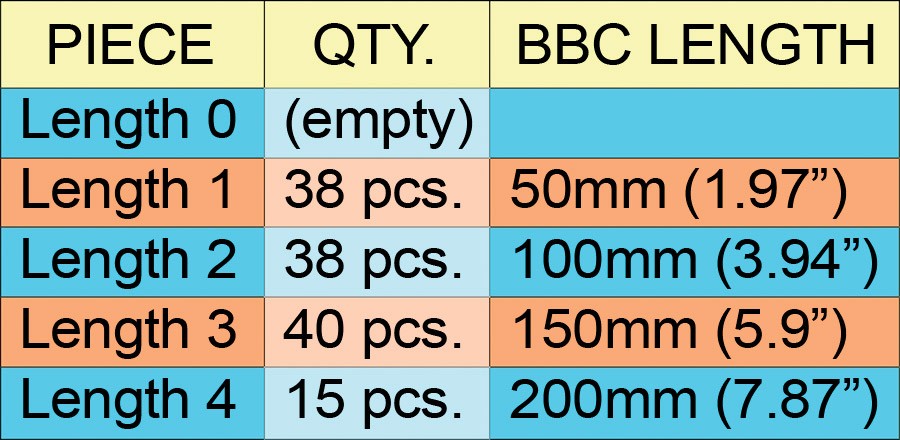
The project is somewhat flexible, in that the diffusor can be made to any reasonable depth — the longer the pieces, the lower the frequency at which the diffusor is effective (the tradeoff is weight). I made shallow panels — my four lengths (in inches) were 4, 3, 2 and 1, for effectiveness above about 1.7 kHz. Doubling the lengths to 8, 6, 4 and 2 extends diffusion downward to 850 Hz. Using simple math to maintain proportions, these lengths can be adjusted by any practical amount — the longest piece in the published BBC design is 200 mm (7.87 inches). Because I find absorption at low frequencies and diffusion at higher frequencies to be a good combination, the higher effective band was determined to be adequate for my needs.
Step 2: Select Lumber
For 4 inch deep diffusors, each panel will require slightly more than three 8 foot lengths of 2 inch by 2 inch studs. When selecting lumber, avoid excessive amounts of large knots as they can cause dangerous saw kickback. Since the cut lengths will be short, some warp in the studs is fine (and inevitable), but weed out the twisted pieces and 'bananas.' Pine, a most common material, is inexpensive, readily available at big-box hardware chains and it's lightweight. If you can source them and are willing to pay the extra cost, ultra-light exotics like balsa and paulownia will reduce weight by as much as half.
Step 3: Cut Pieces to Length
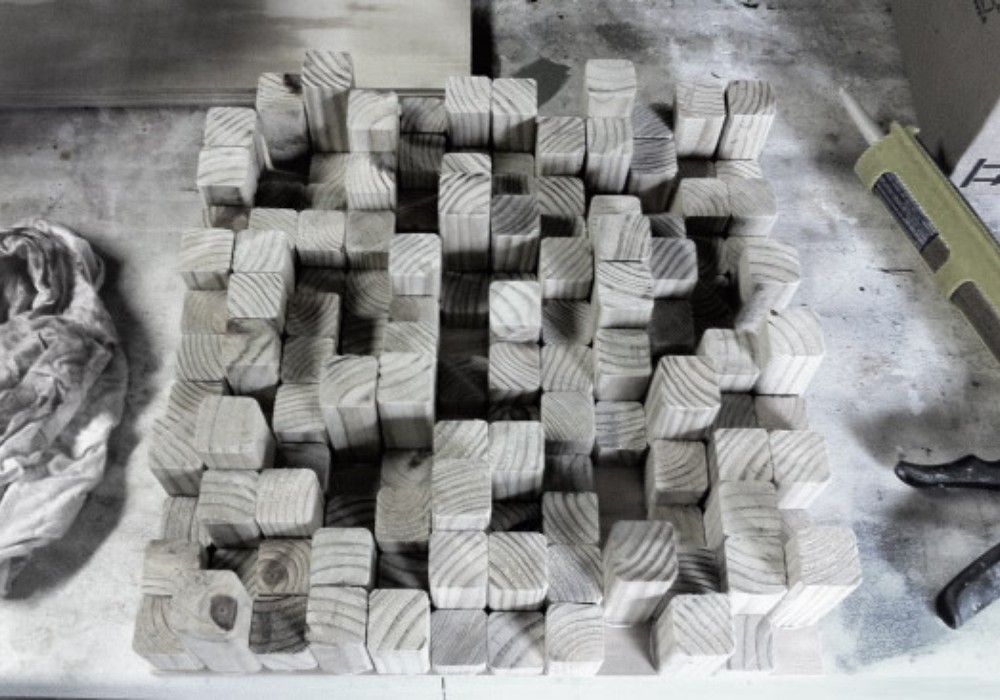
A table and/or chop saw is near essential for this project. You will be making a lot of cuts, especially if building multiple panels, and won't want to waste time with the wrong tools. Inexpensive, adequate saws are available (and worth it). Familiarize yourself with your saw's safety procedures, then measure and mark each length. After making the proper number of cuts (Fig. 2), and perhaps running off a few extras, arrange your pieces by length. Trim your 1/4-inch plywood or hardboard slightly larger than 18 inch square. I recommend an extra half-inch or so in each direction to account for variances due to milling tolerances, wood warpage, etc.
Step 4: Glue Panels Together (paint optional)
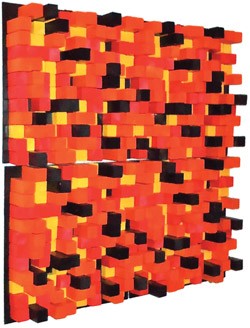
Before assembling, consider painting each length its own color. An attractive four or five color scheme results in a panel that's as decorative as it is functional (See photo at right). After paint is dry assemble according to Fig. 1, making sure to leave spaces marked with a "0" empty. Apply high-quality wood glue to the bottom of each piece before attaching to the backing board. If desired, you may also apply glue to the side junctions of pieces for extra durability. Neatness counts.
Step 5: Hang And Enjoy
Use appropriate mounting hardware to hang your panels. Because my 4-inch deep pine panels weigh less than 12 pounds each, I elected to hang them with picture wire, like art. I also applied rubber feet to the rear four corners — this keeps the hanging panels from marring the wall surface and allows the option of temporary placement on the floor to diffuse floor-to-ceiling reflections.
You should be able to build these diffusors for $15-20 per panel, depending on depth. With careful assembly, they look great and offer superior management of specular reflections.
